

“Nealer’s Healers” Personalized Graston Tools
Project Motivation
Goals: Athletic trainers use graston tools for hours a day to break up scar tissue and reduce inflammation. As a parting gift to my athletic trainer, I wanted to make a personalized set of high quality graston tools for her to use during travel competitions
Criteria: Using CNC, design and manufacture a highly personalized set of graston tools, using trainer’s personal preferences:
Shape variety, edge angle, material and weight
Ergonomics
Preserve tool standards

Process + Prototyping
Conducted need-finding with athletic trainers and physical therapists to find the most important details to include in this design.
These tools are used with lotion, which makes some tools difficult to use due to slipping on small and smooth surface areas. Having weight, textured surface, and a detachable grip would help resolve this
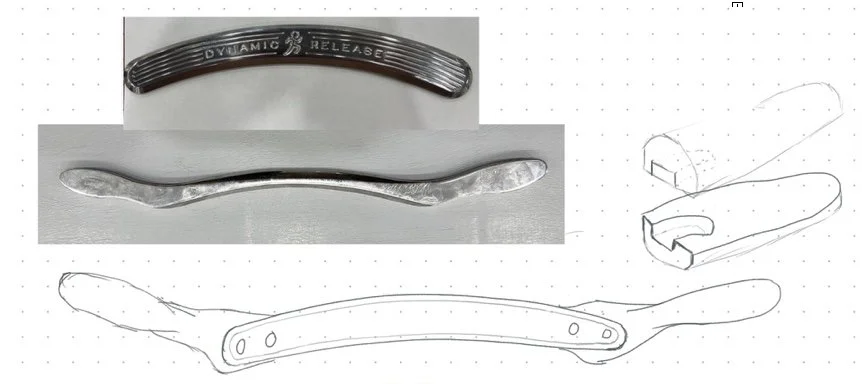
Referenced high quality tools to find the strengths and weaknesses between different designs.
High quality tools had beveled edges instead of rounded edges, which help trainers get a better feel of the scar tissue in the muscle
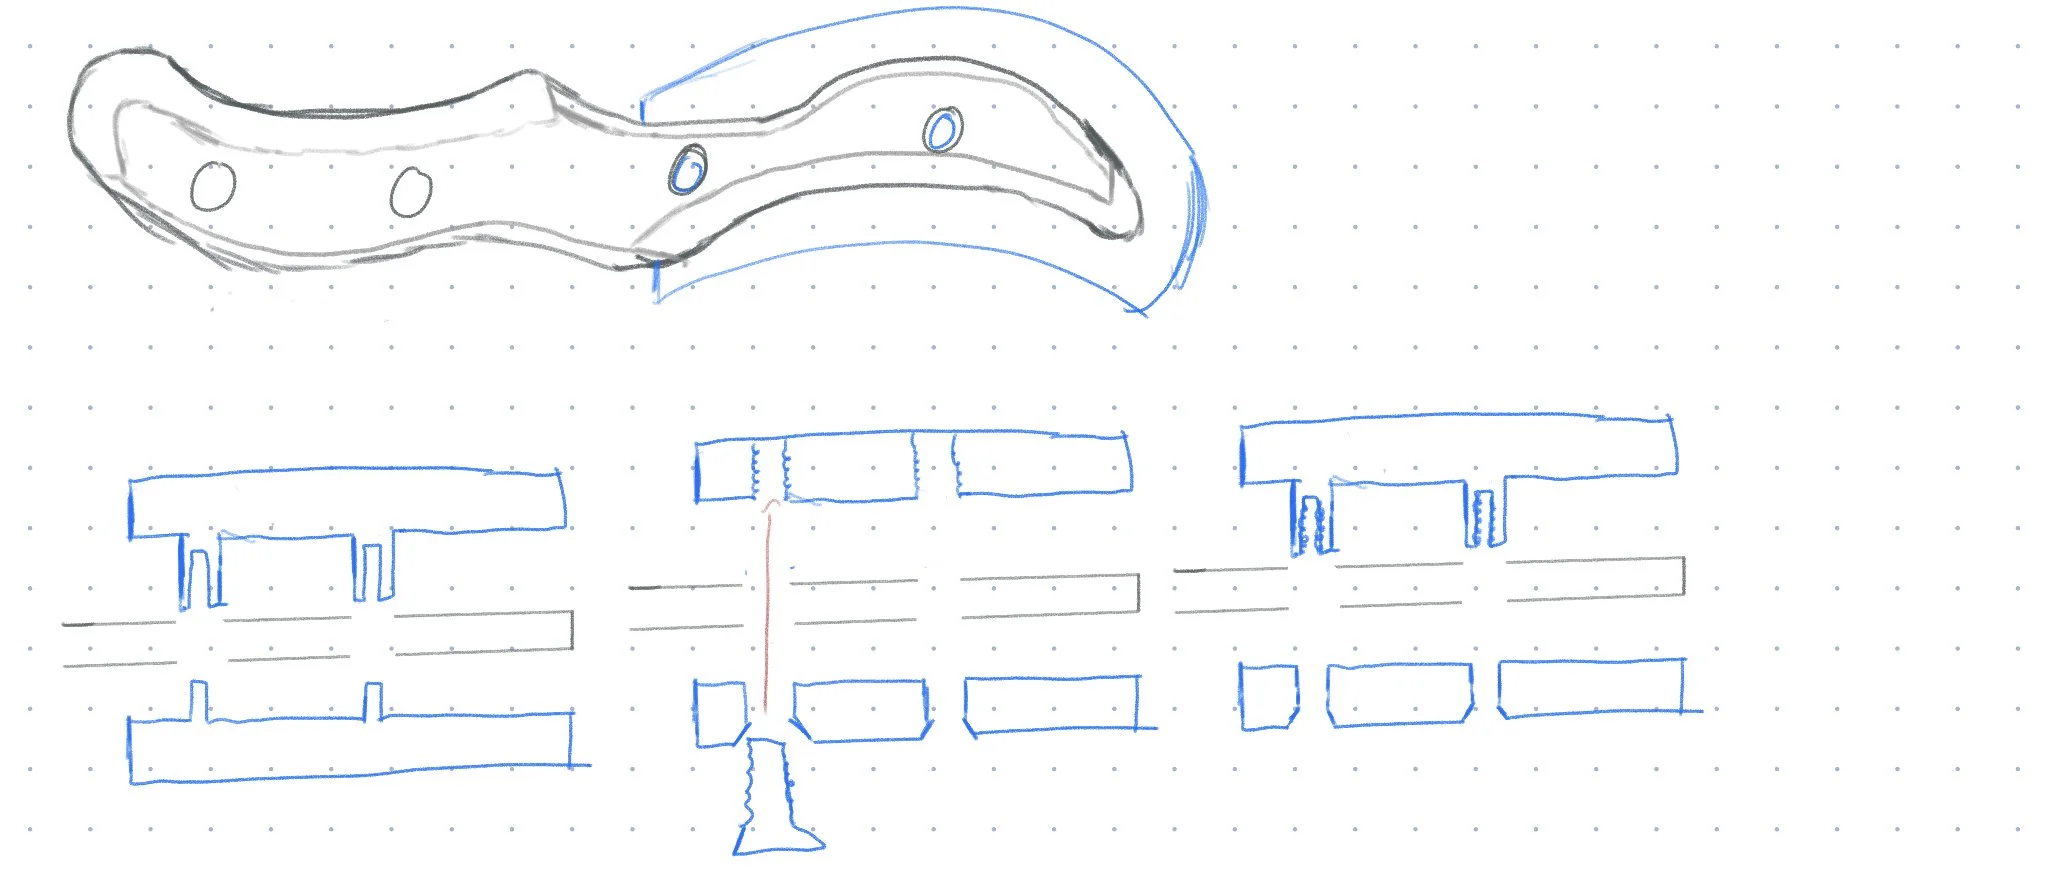
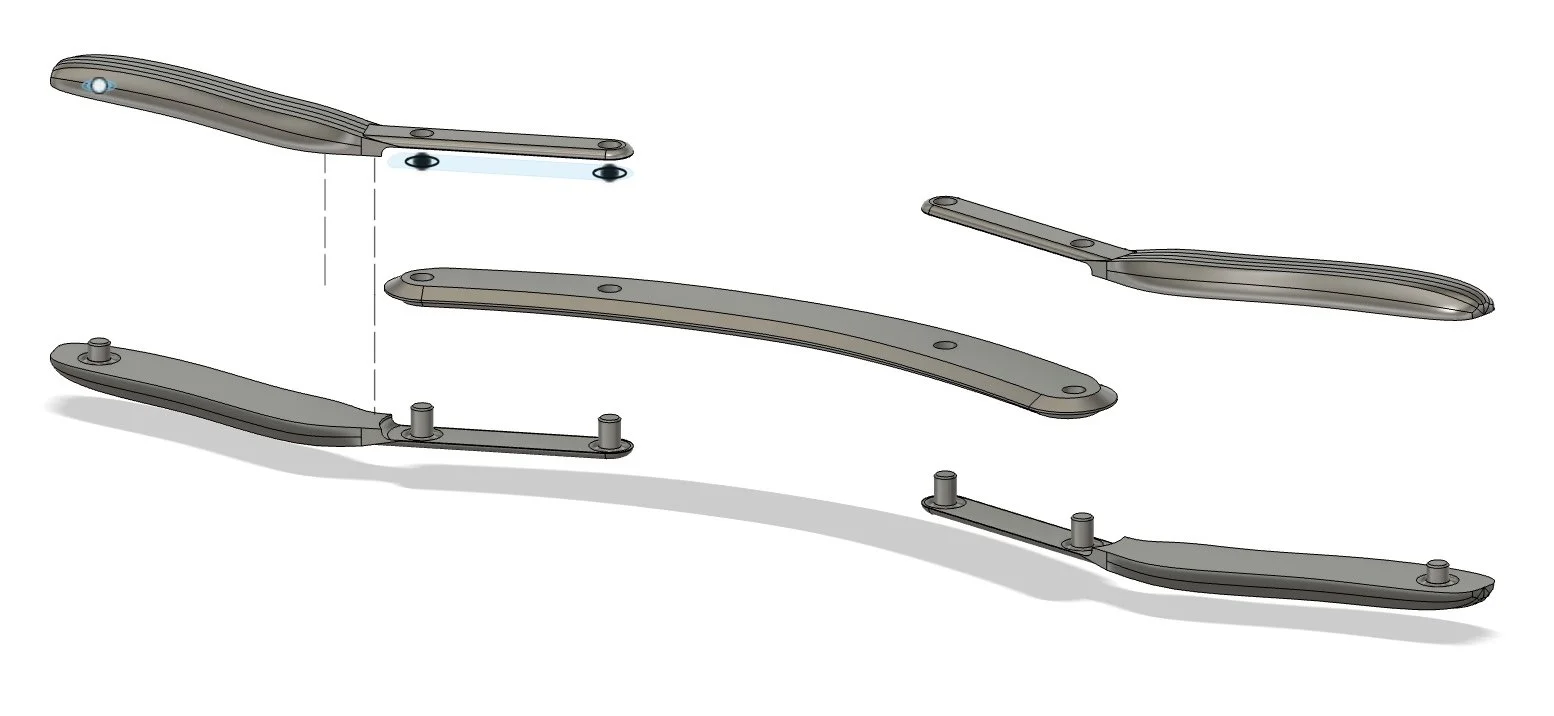
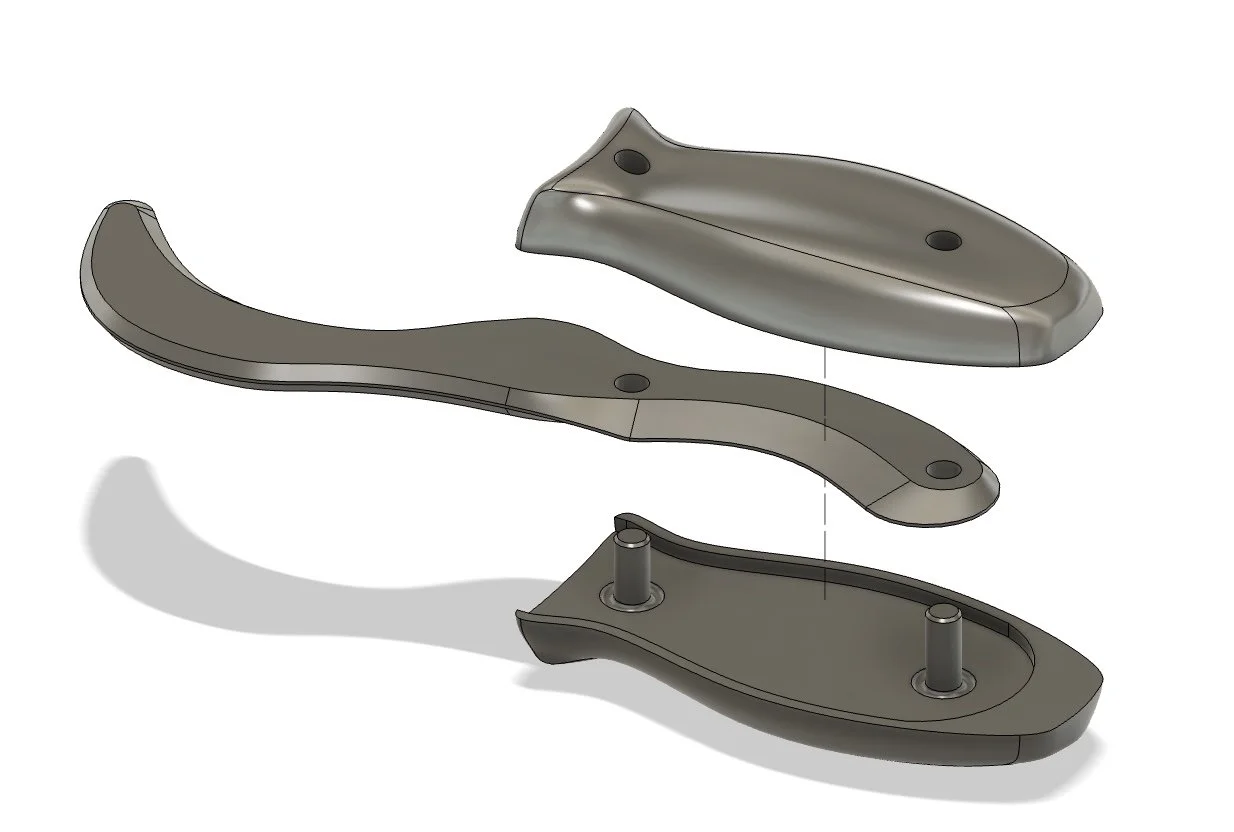
Used sketches and prototyping to iterate detachable friction fit handle design
Handles should be quick to put on and remove so the tools can be versatile
Design Decisions
Key Choices:
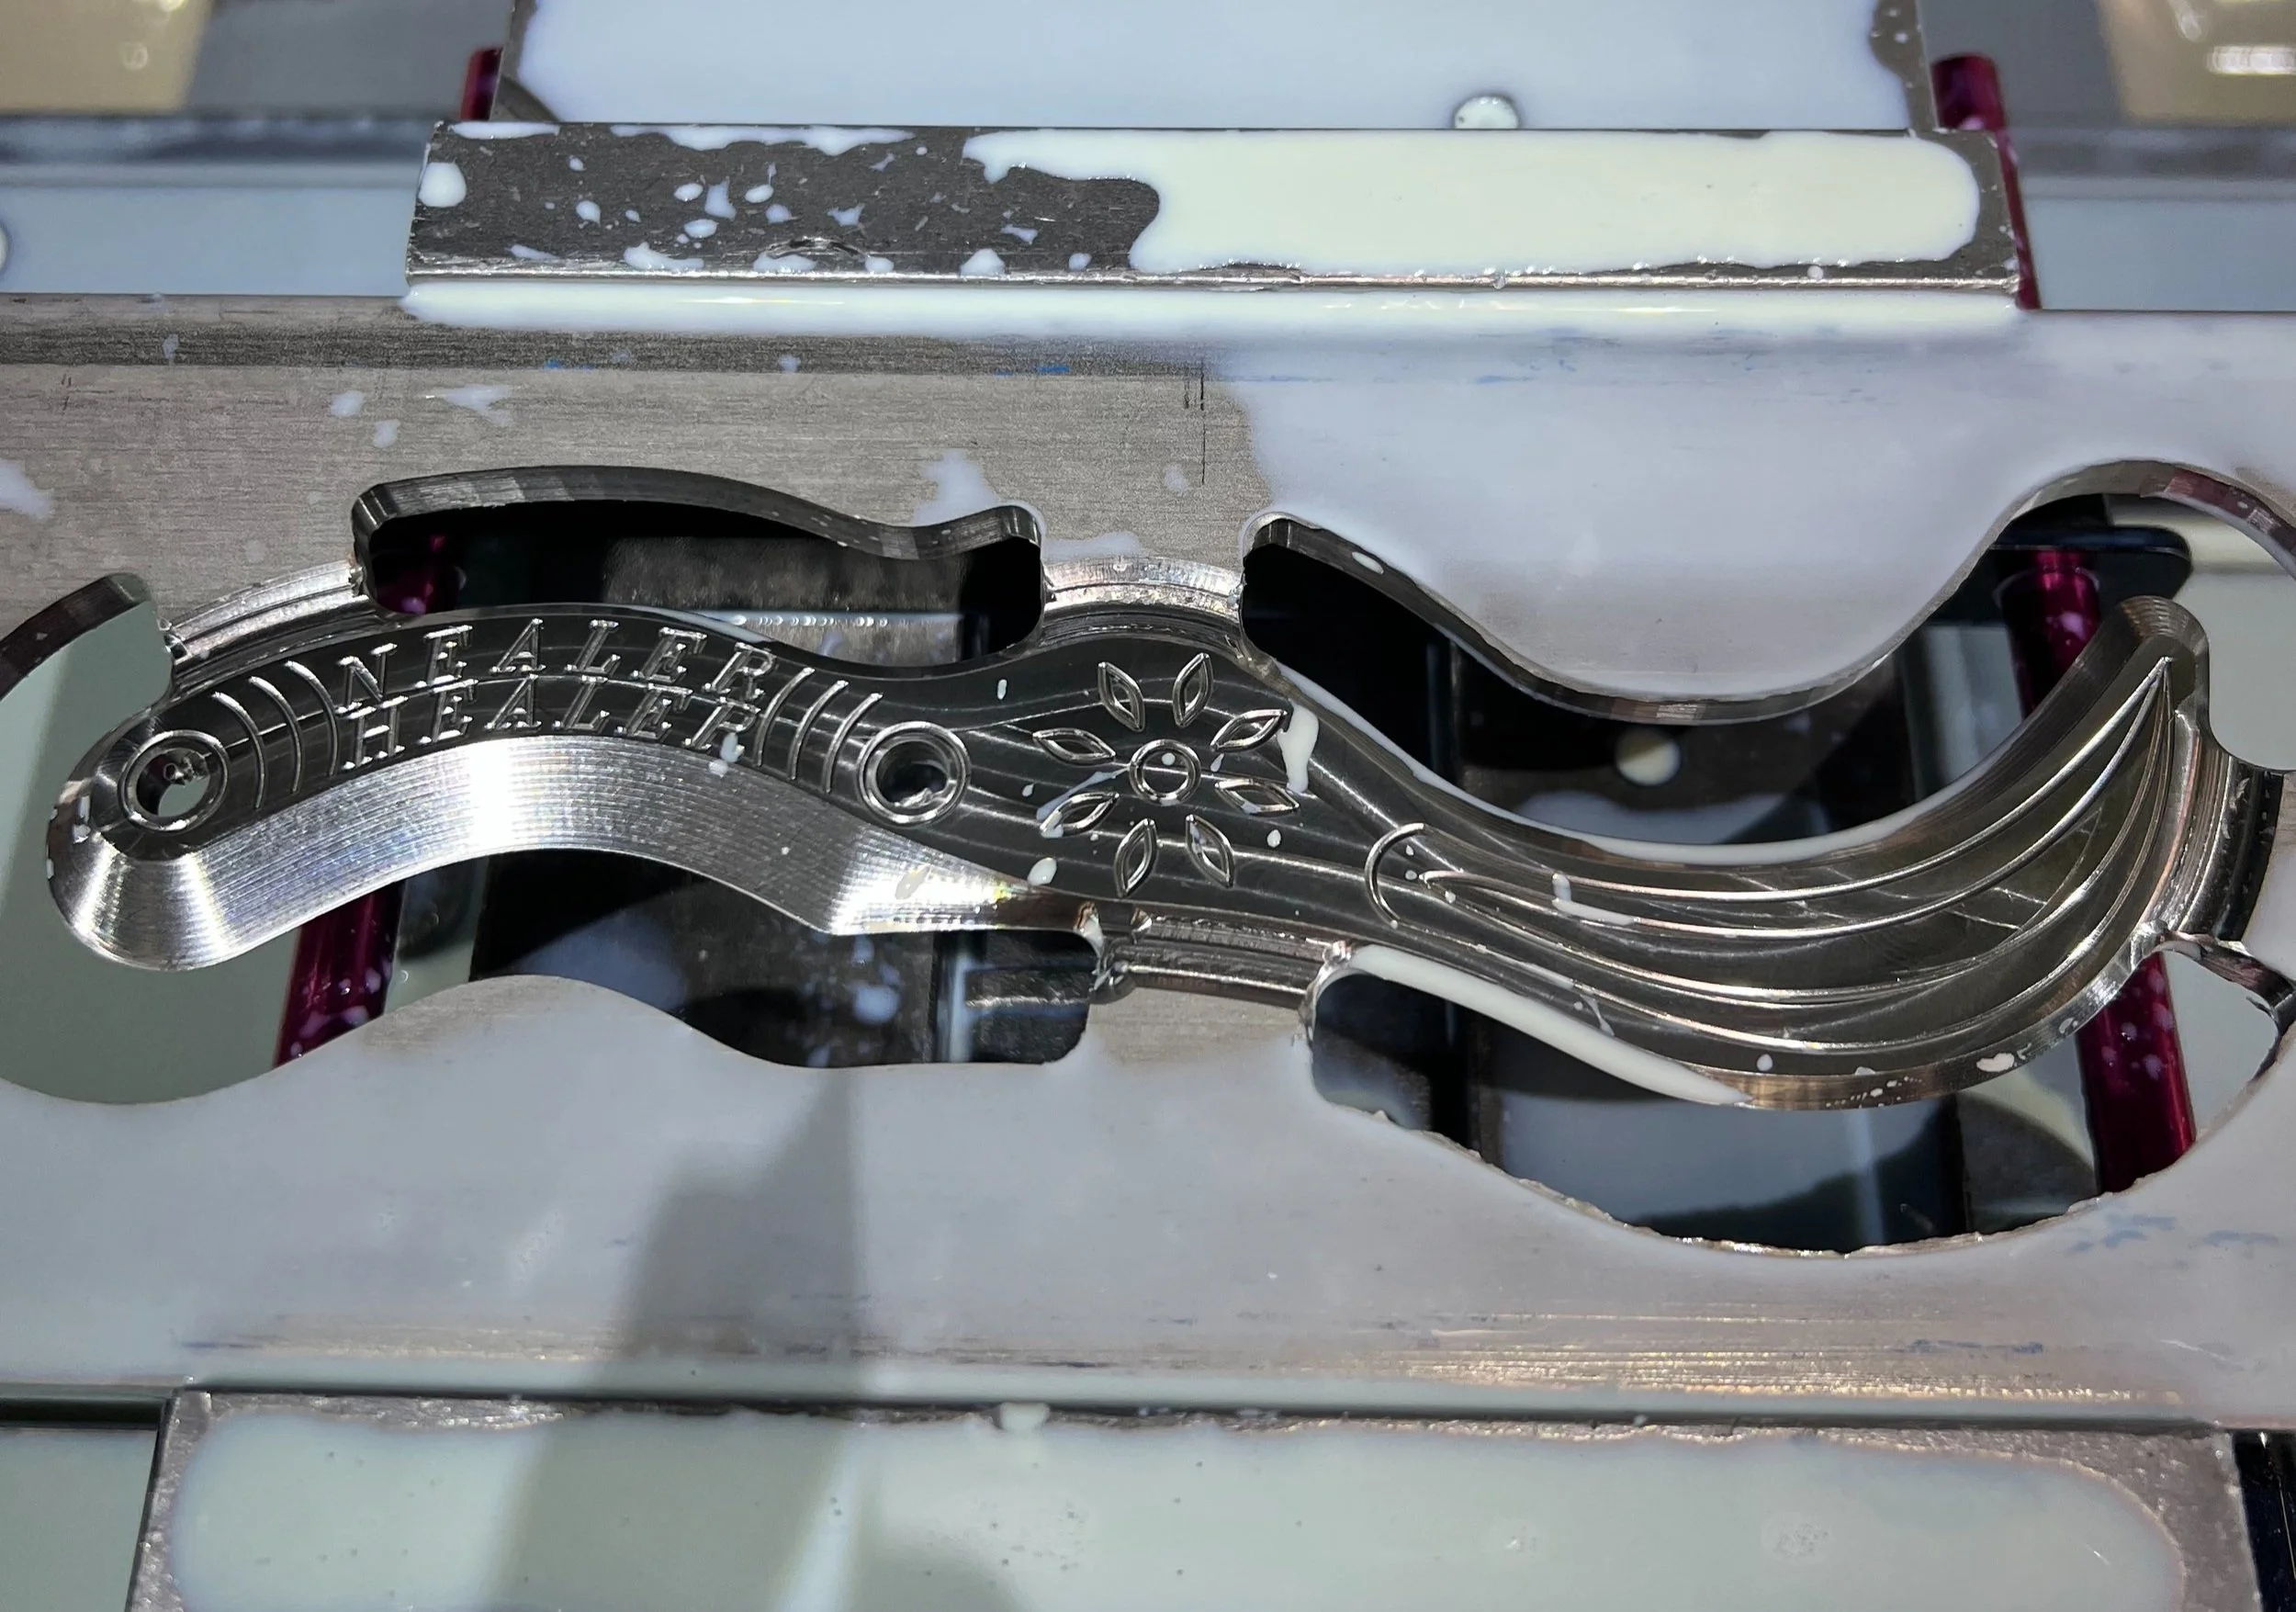
Use 304 Stainless Steel for material
This greatly increased machine time but was deemed a necessary feature for a high quality set of tools
Workholding: tabs
Because the stock was so thin, wax or soft jaws were unable to be used. If given more time, fixture plating would have been a more robust solution. Considering the scope of this project, I settled for using tabs.
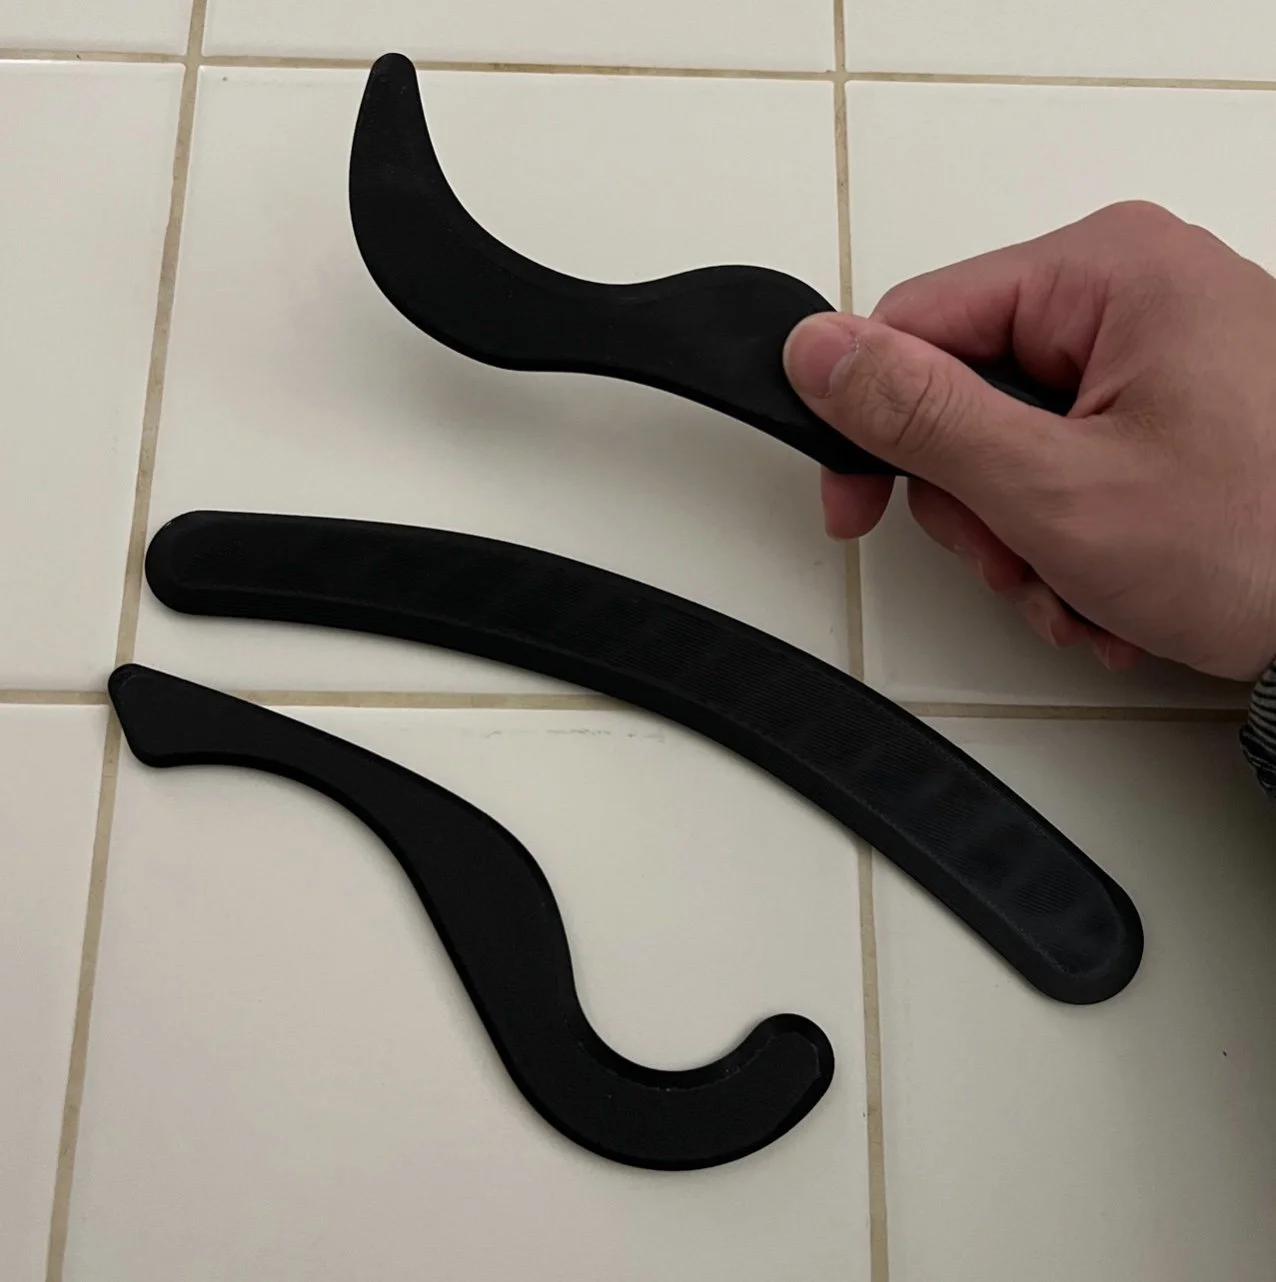
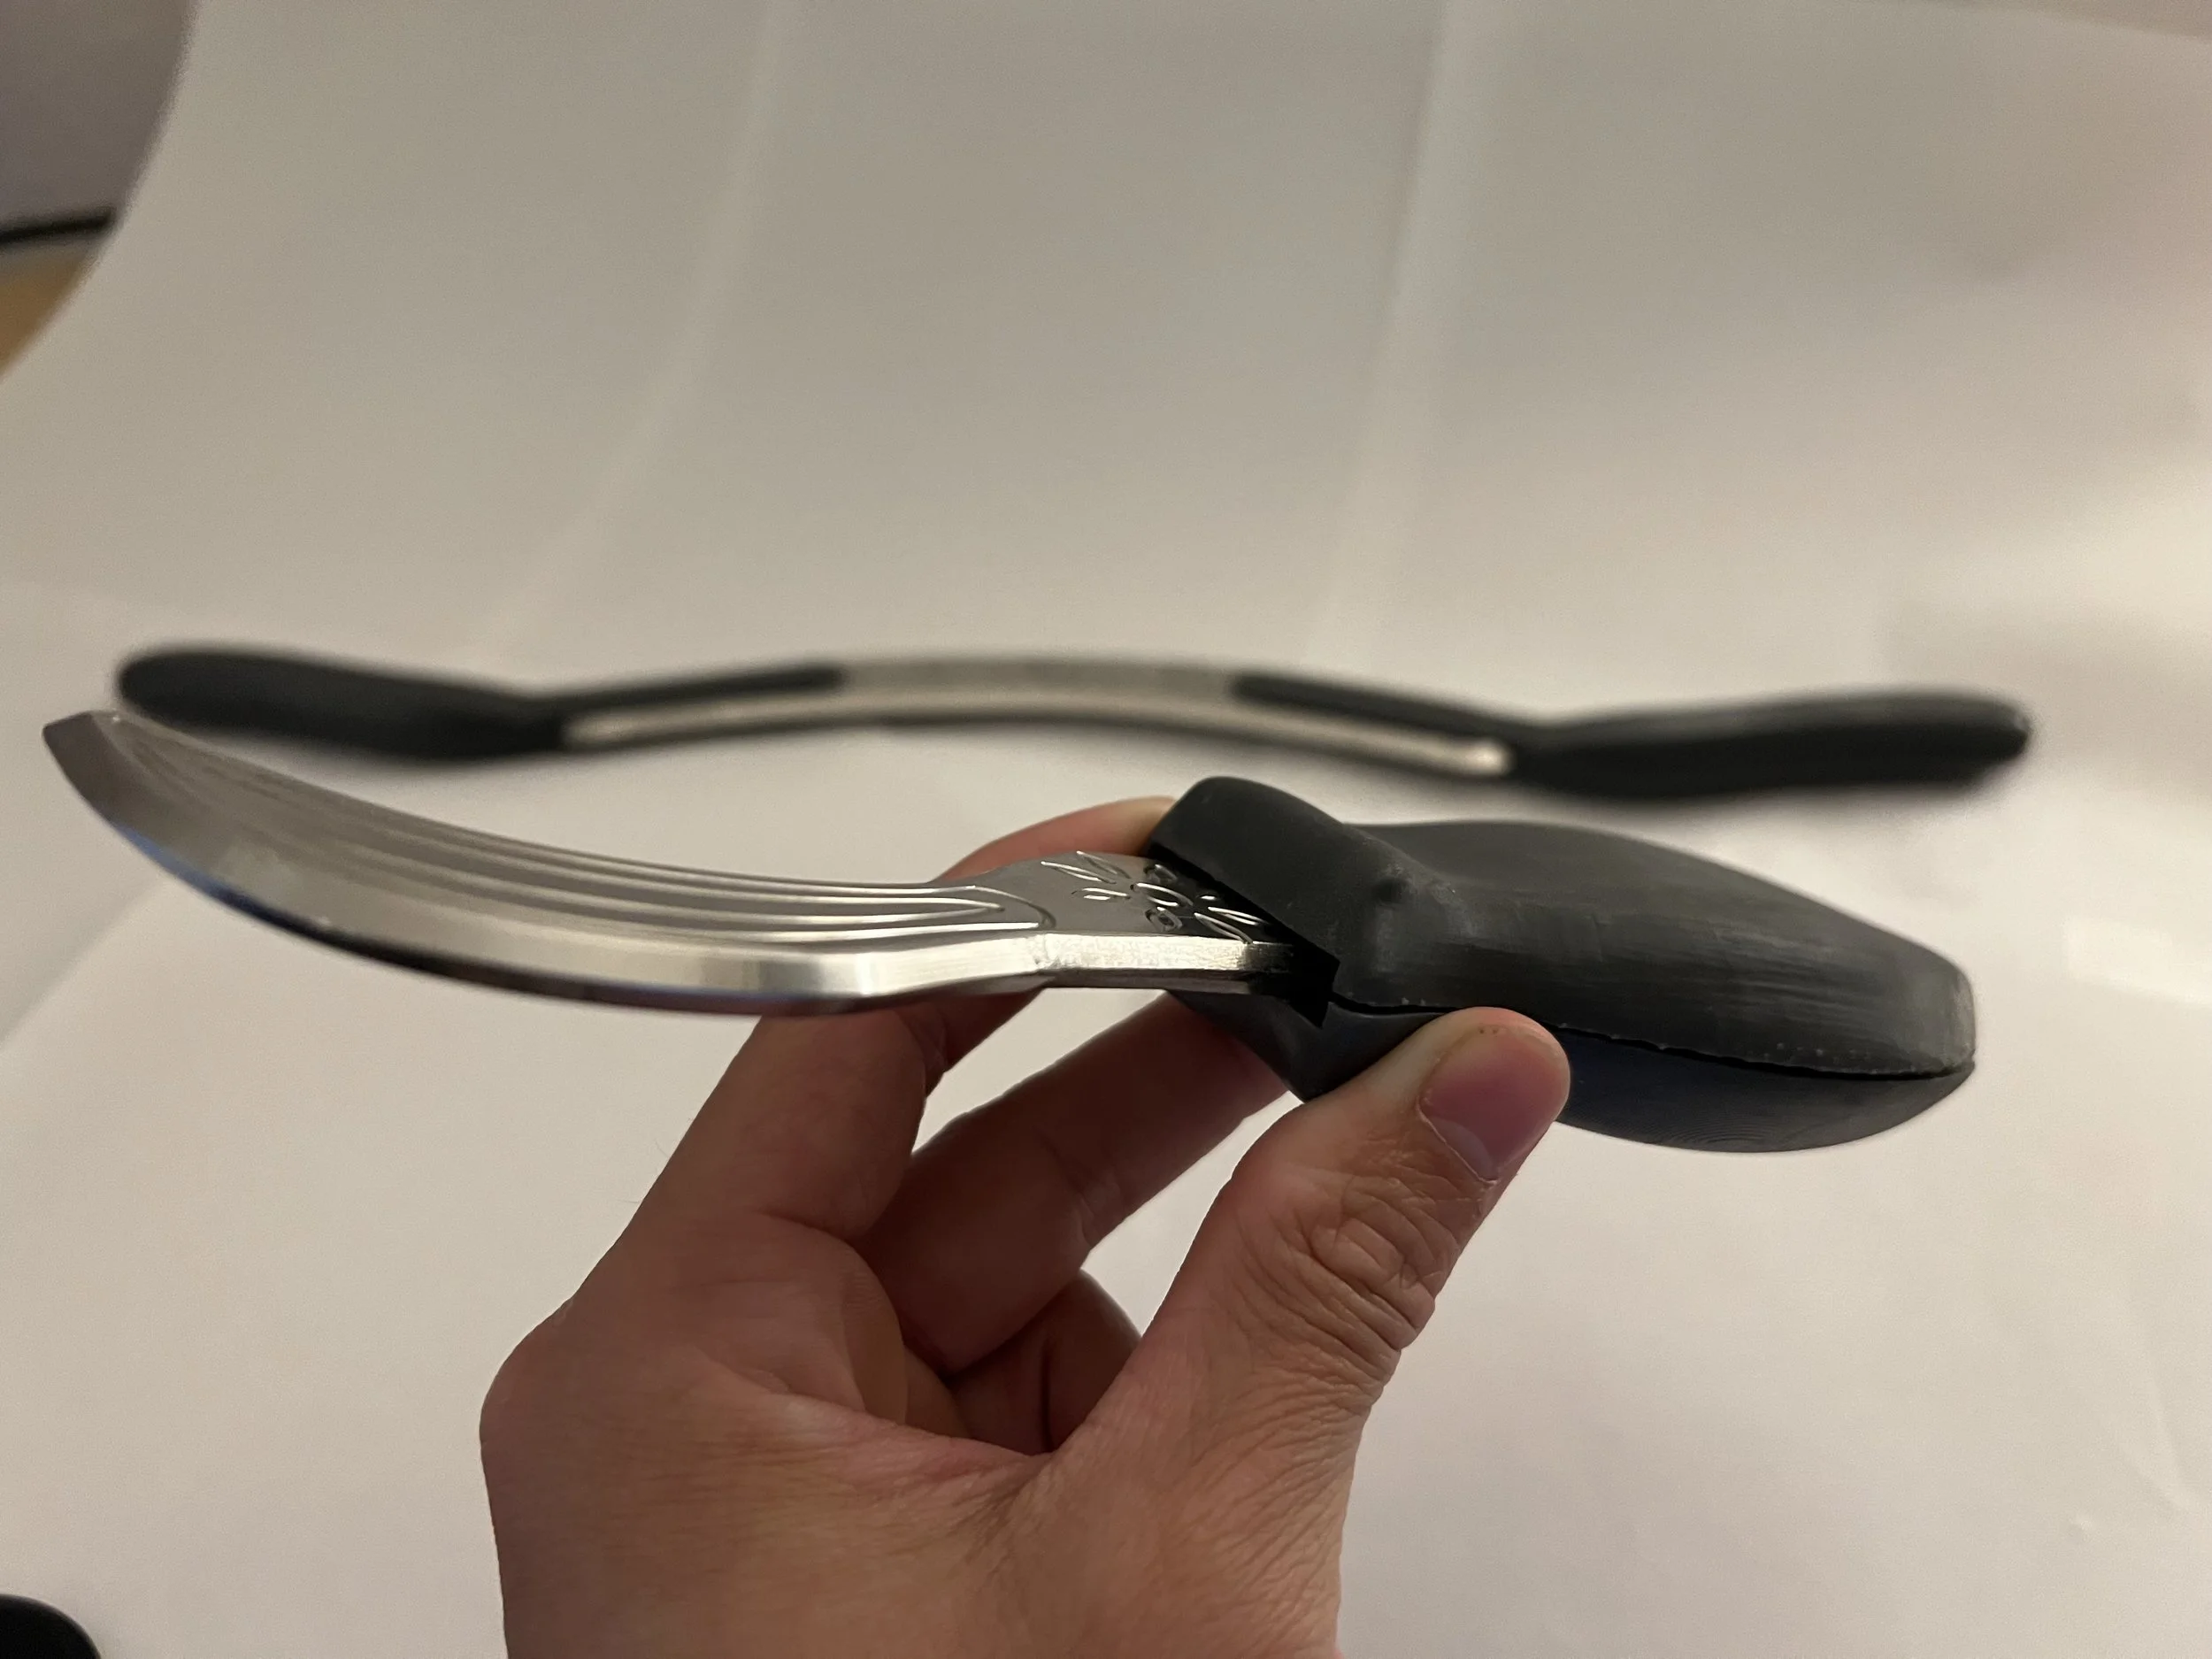
3D printed handles
Due to limited machine reservation time, I would be unable to CNC the handles. I adapted the handles to take advantage of 3D printing strengths. I used a semi-pliable, tough and grippy Grey-Pro Resin from Formlabs, and dimensioned the handles such that they could be friction fit into the tools
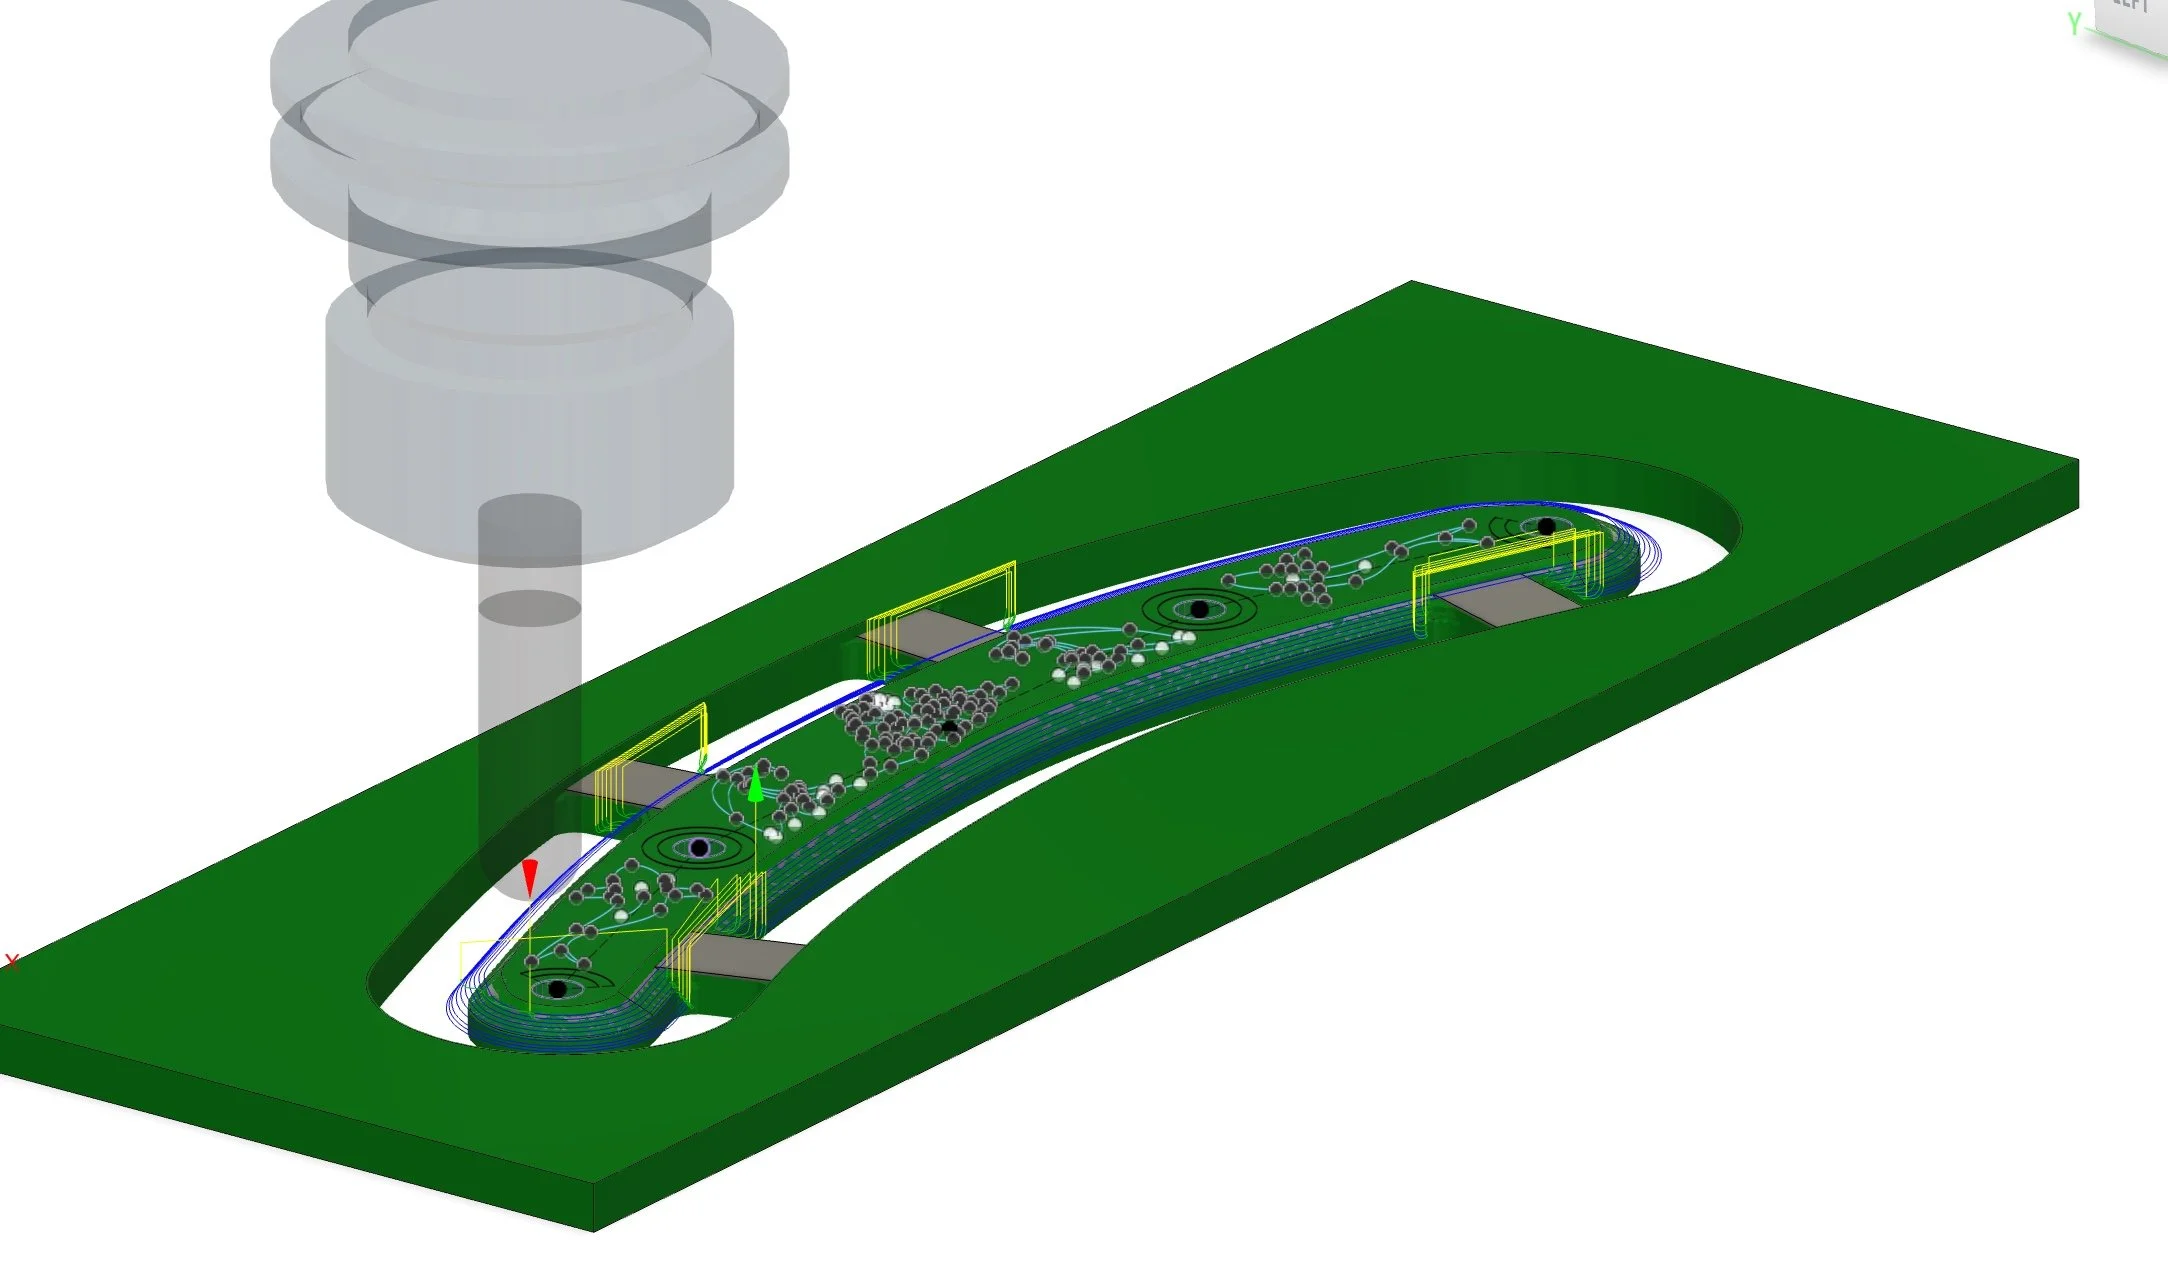
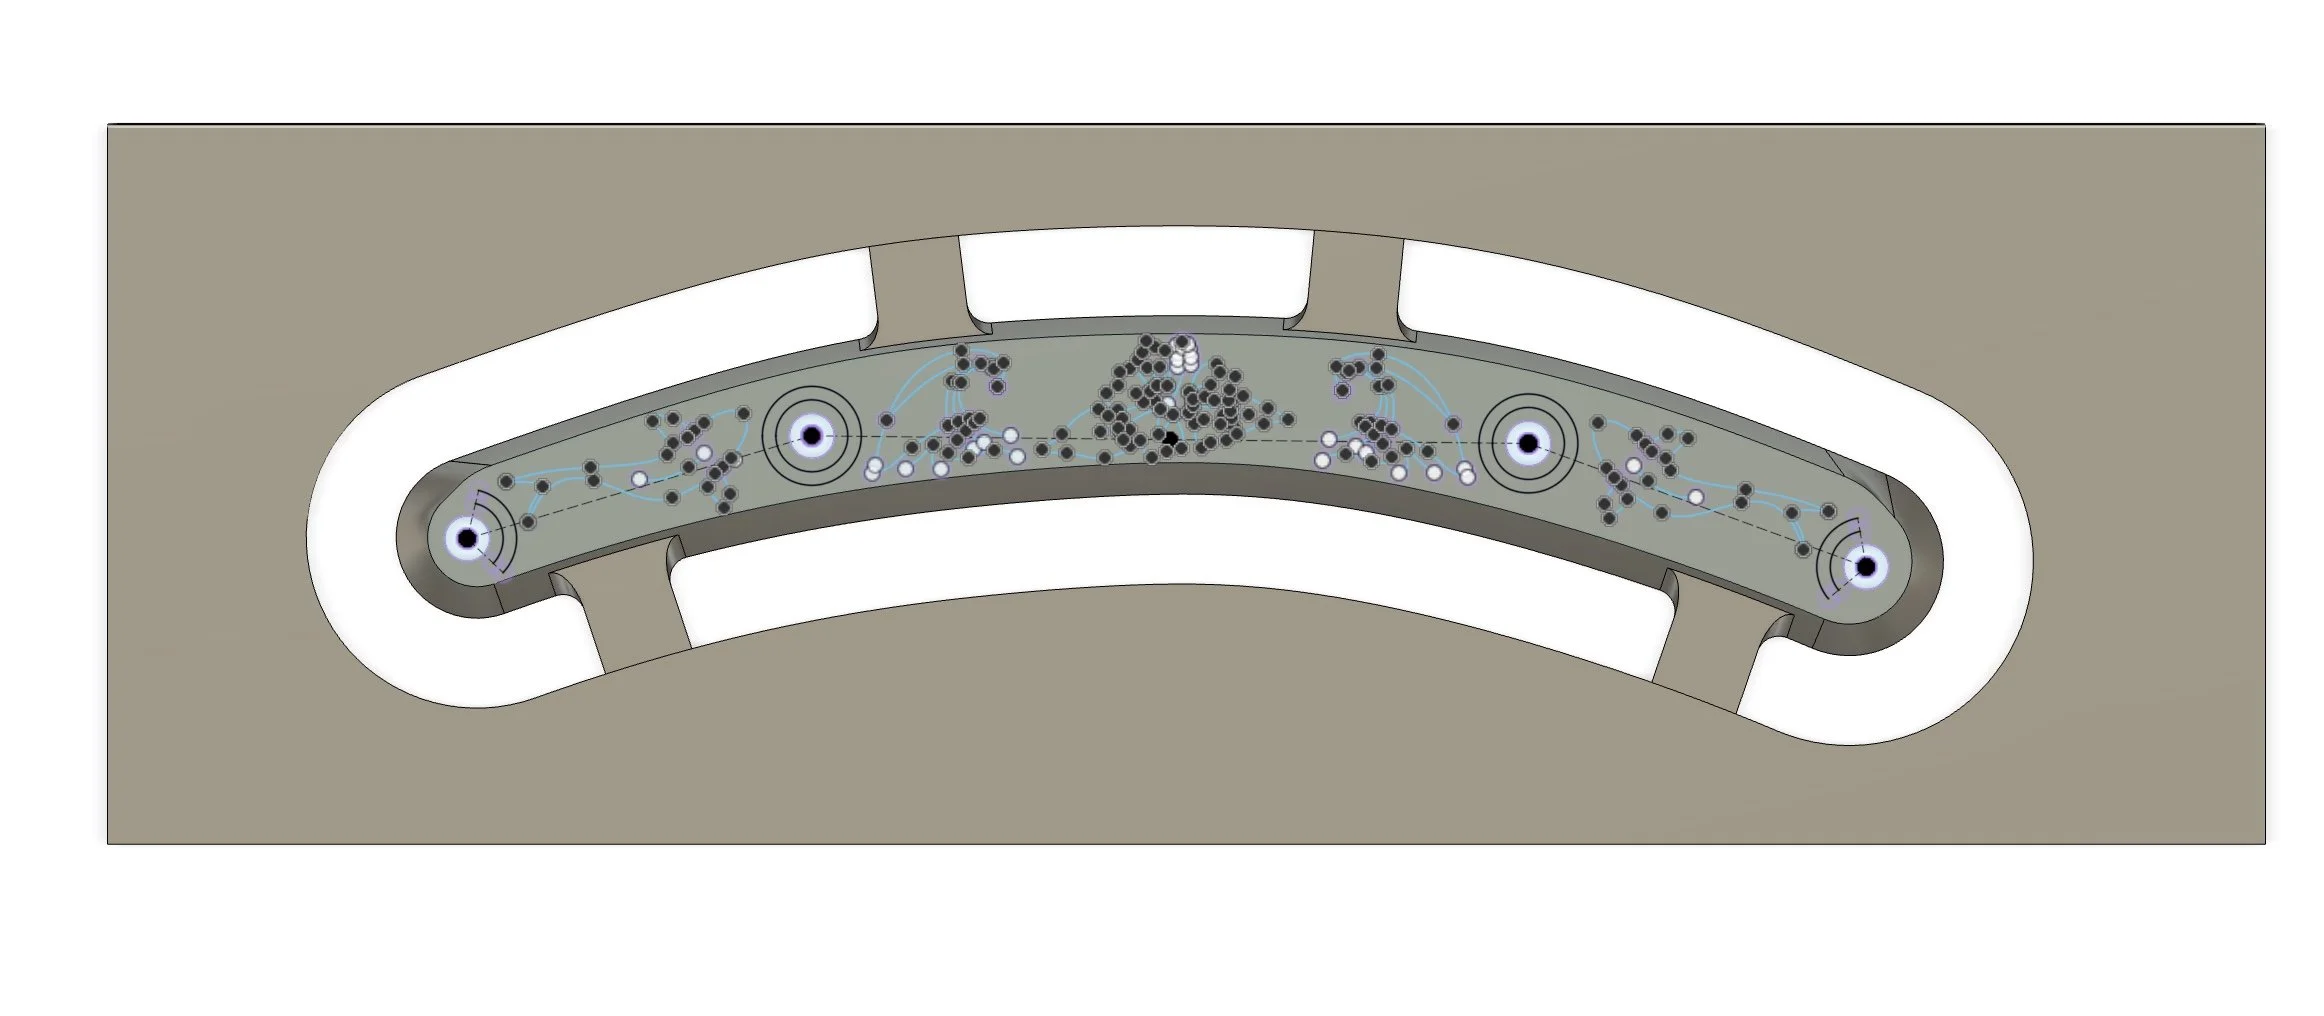
CAM
Face with FEM
Center drill with #3 Center Drill
Drill holes w/ 1/4 “ Drill
Pocket/Adaptive w/ 1/4” FEM
Contour w/ 1/2” BEM
Engrave w/ 1/16” BEM
2D contour LAST!!! (or else edges too sharp)
Similar operations for all 3 pieces
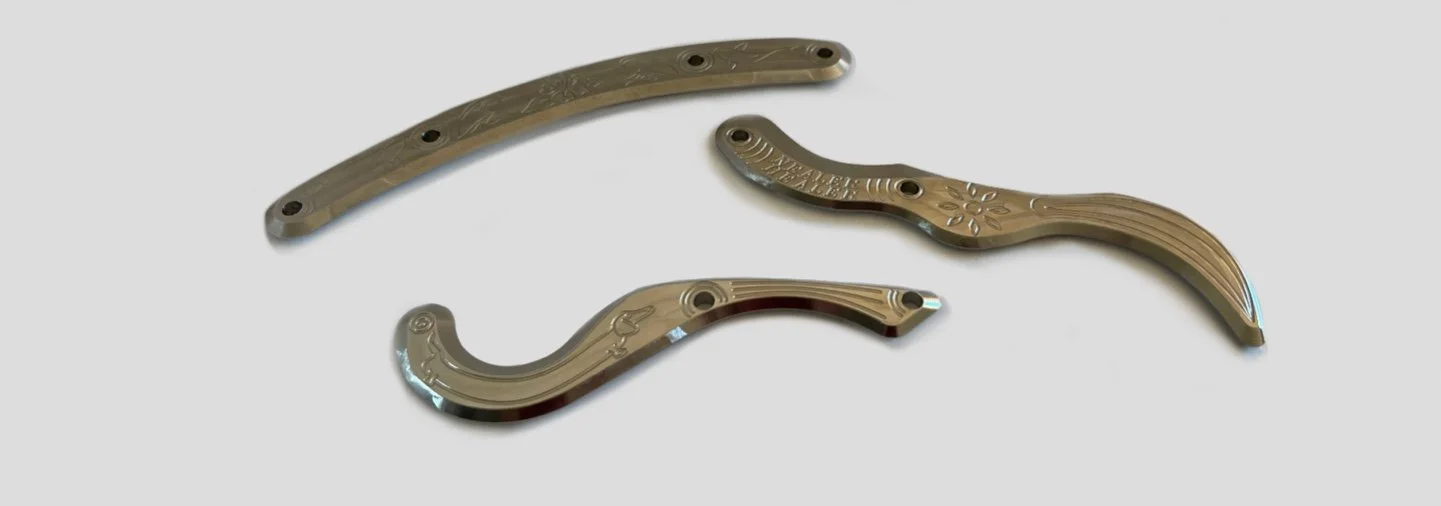
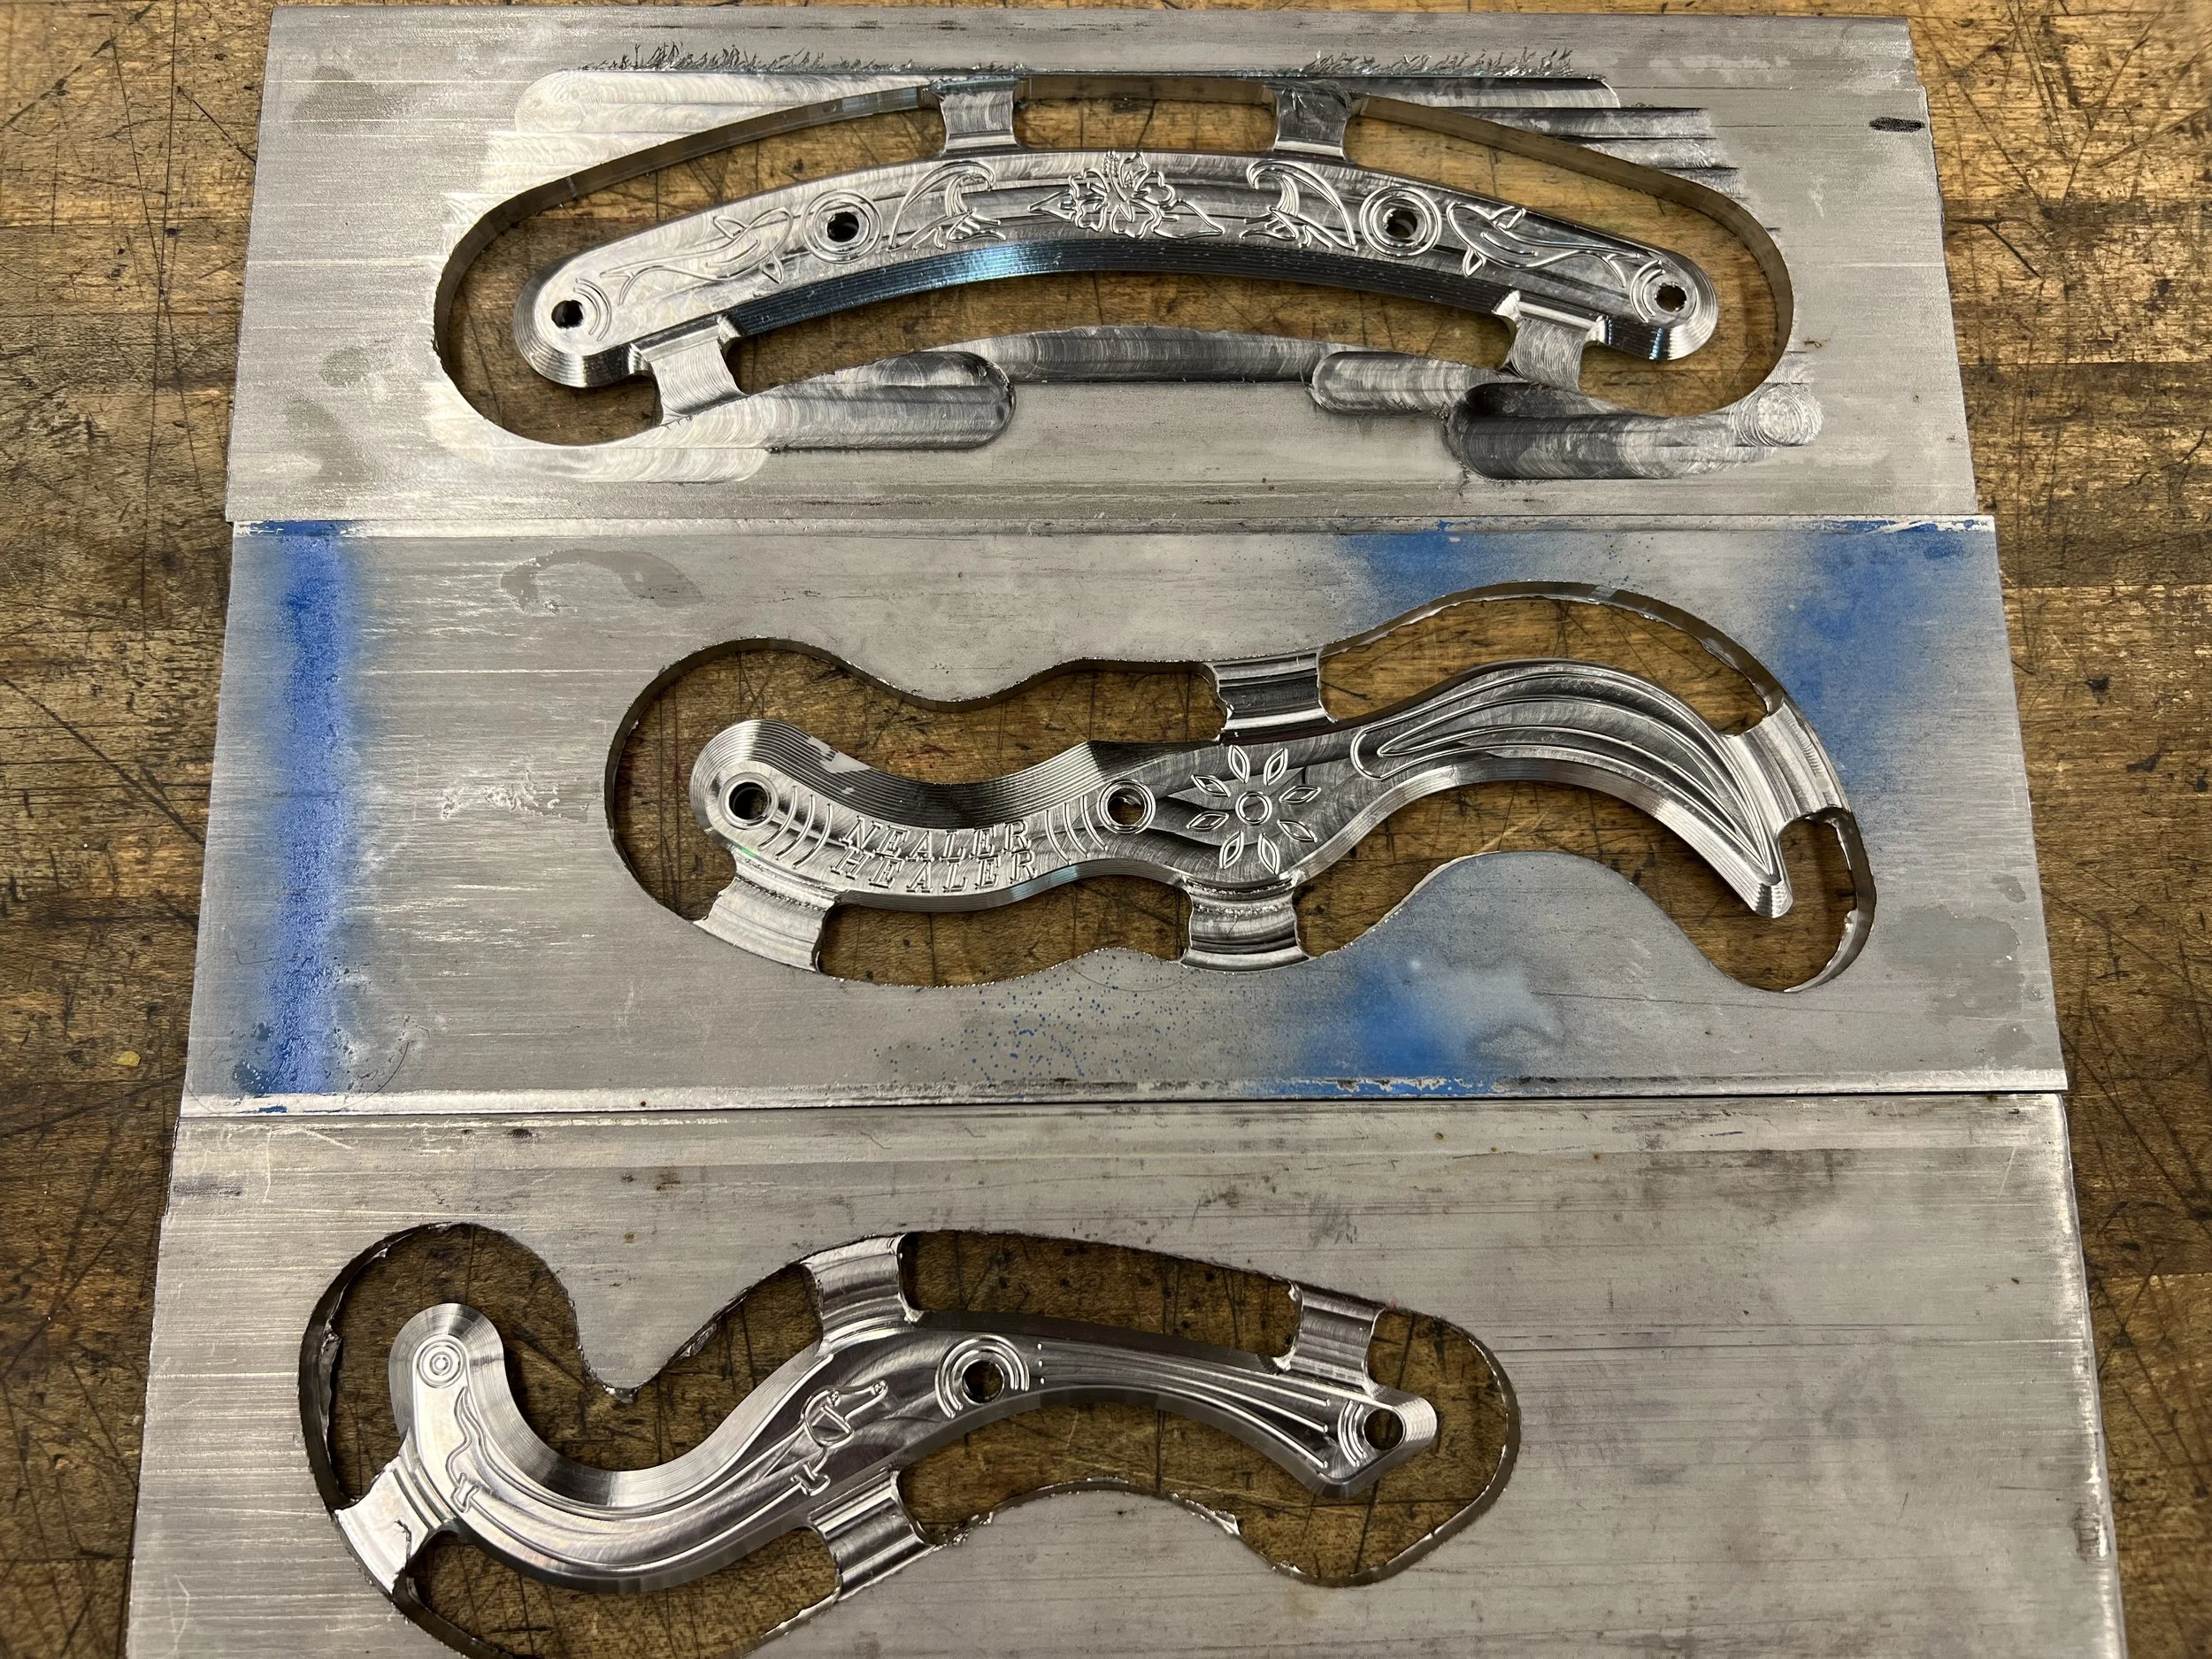
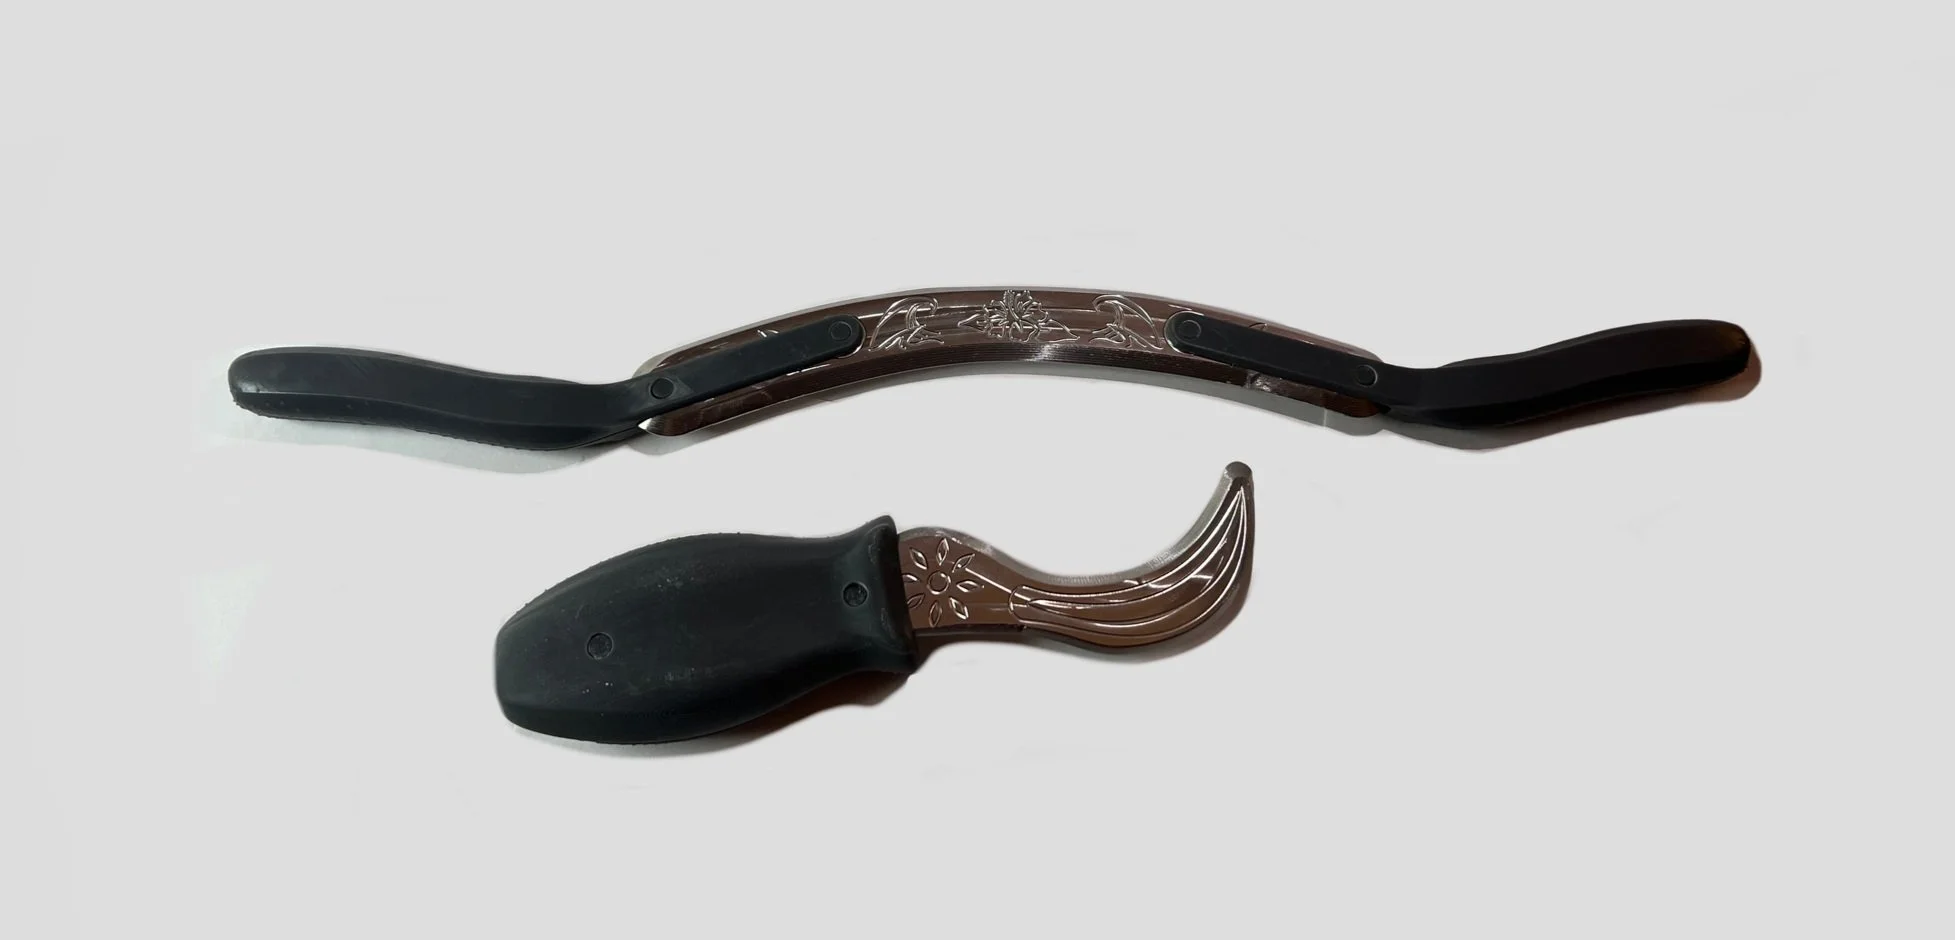
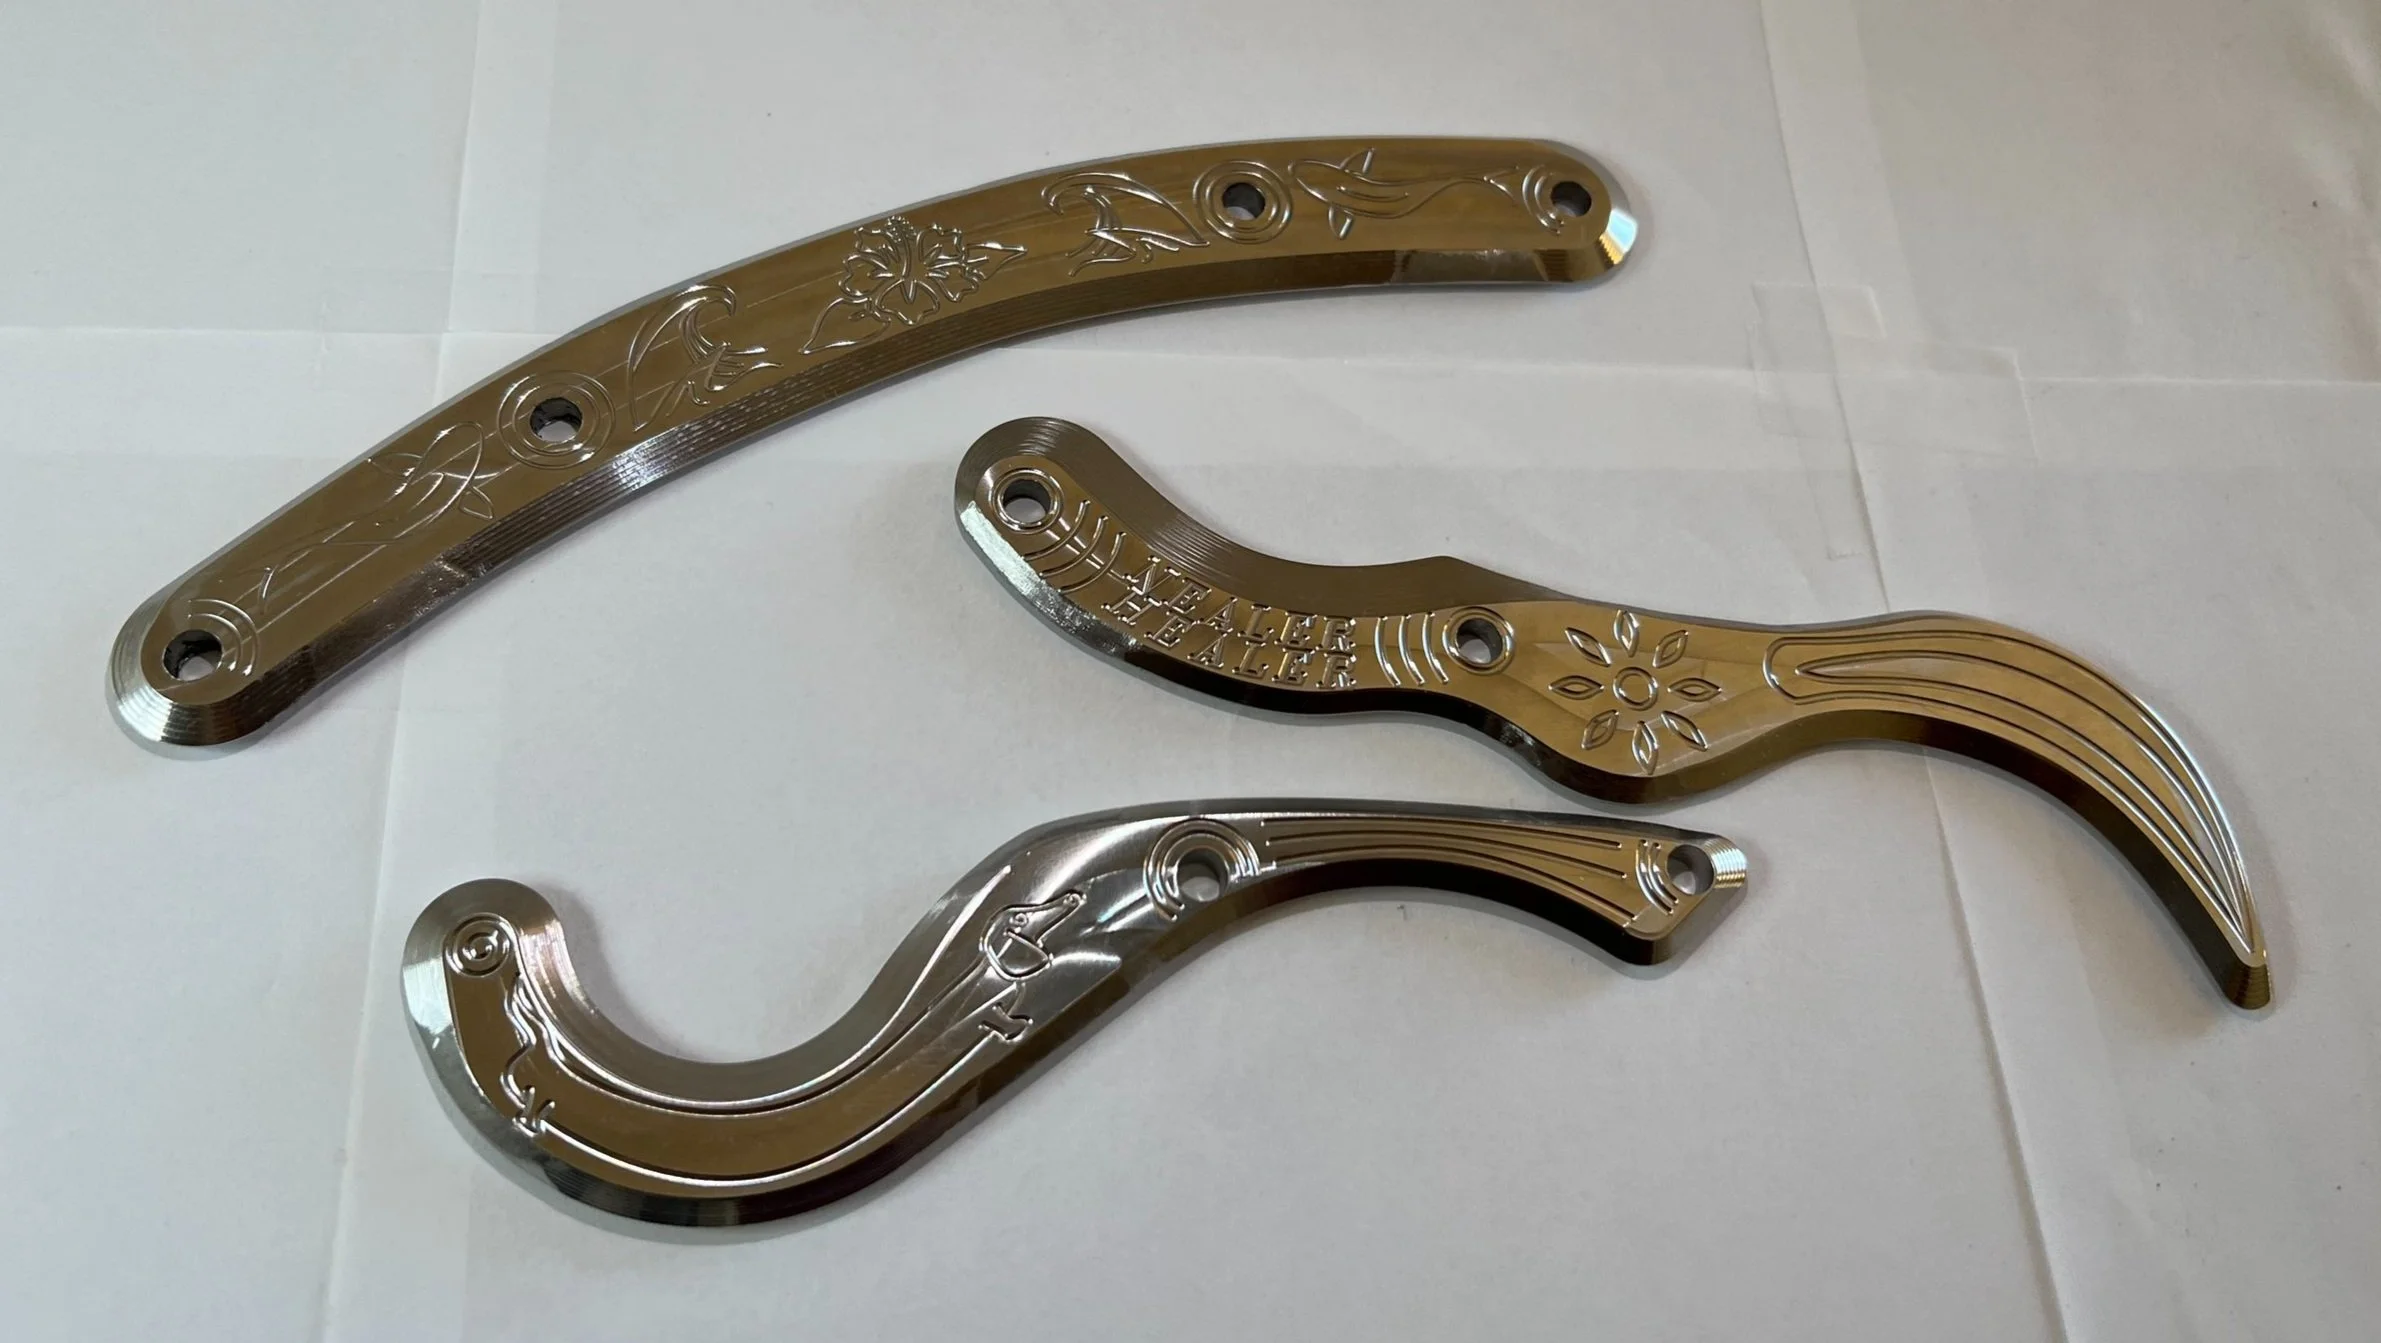
Finished Design
For this project I took a great deal of care with the engravings and added a lot of details that held personal significance to the user.
Though I had originally wanted to machine the handles, they fit onto the pieces securely and give the tools a much more ergonomic grip. It took a few iterations, but I was able to refine them so they were strong enough to be used aggressively without being too bulky.
I gave them as a gift to my athletic trainer and I was happy to hear that she loved the design and quality. She even used the tools for treatment on my injuries, and I am pleased with how well the edge design turned out.

Skills Learned
-
Working with stainless steel meant cutting rates had to be much slower. Optimizing every operation and tool path was crucial to cut down machine time to get this project done on schedule.
-
For this project I focused on creating a surface quality that could be left as-machined without the need for further finishing techniques. To accomplish this, I used slow feed rate finishing passes on each surface, carefully optimizing the machining process to reduce cusp height and achieve a smooth, polished appearance.
-
This project utilized a lot of organic shapes. Everything from the tool profile, ergonomic handles, and engravings were extremely freeform. Before this project I had no idea how to model organic shapes in CAD, and by the end I had a solid foundation, and now feel comfortable tackling more projects in the future.